So, you have this dashboard. It’s a super cool dashboard. You’ve also got an elaborate Tableau Prep workflow to feed your dashboard. Unfortunately, time didn’t stop as soon as you finished this project. And with time, comes more data. So, you must go back to Tableau Prep, log in to all the servers you’re getting the data from and the server you’re publishing the data to, then run the entire workflow again. Every day. Or … do you?
Automating Tableau Prep Workflows
Tableau Prep allows for command line output refresh. If you’re unsure about whether to be excited or not, you should be. This feature allows you to automagically run your Tableau Prep workflow on a regular basis.
It is also important to note that Tableau recently announced the coming of Tableau Prep Conductor, which is currently in beta testing. Conductor will be an add-on product that allows for consistently delivered prepared data on a larger scale than the solution provided below. However, until Tableau Prep Conductor becomes available, here’s how you can automate your workflows in three easy steps:
- Create a credentials .json file
- Create a batch file to run the workflow
- Use Task Scheduler to run the workflow on a regular basis
These three steps might sound easy if you have previously created a .json file and a batch file and worked with Task Scheduler before. I had done approximately zero of these things prior to this task, so I will attempt to write the article I wish I’d had at the time.
Step 1: Creating a Credentials .json File
Copy and paste the code below into Notepad:
{
"inputConnections":[
  {
    "username": "user",
    "hostname":"mssql.hostname.lan",
    "port":1234,
    "password": "secret_password"
  },
],
"outputConnections":[
  {
    "serverUrl":"http://yourServer",
    "contentUrl":"site_name",
    "username":"user",
    "password":"Secret_password”
  }
]
}
You will need to replace the credentials in blue italics with your own. Once you’ve replaced the necessary information, you then must save your file as a .json file. To do this, you must select Save as, then at the bottom, change the file type to All Files. Give it a file name, with the extension .json at the end of the file. Your Save as dialogue box should look like this:

Hit save and you have completed the first step!
Step 2: Create a Batch File to Run the Workflow
First, you need to give Task Scheduler a file to run that contains the code for what you want to do. In this case, you need to make the file that tells Prep who you are and to run the workflow. To do this, you must create a batch file. There are three things you will need to create this batch file:
- The file path to Tableau Prep
- The file path to your Tableau Prep workflow
- The file path to your credentials JSON we made in step one
To find the file path, you must right click on the file/application and select Properties. These paths will need to be placed in the batch file you create.
Next, copy the code below and paste it into a new instance of Notepad:
"<File Path to Tableau Prep>\scripts"\tableau-prep-cli.bat -c "<File Path to credentials JSON>.json" -t "<File Path to your Workflow>.tfl"
Then replace the objects in blue italics with the corresponding information. When you’re done, it should look something like this:

Next, save this as a batch file. This is similar to what we did in step one, but instead of the extension being .json, this time it will be .bat:

Once you save, you’re two-thirds of the way done!
Step 3: Use Task Scheduler to Run the Batch File Regularly
Use your computer’s search feature in the bottom-left corner of your screen to search for Task Scheduler.
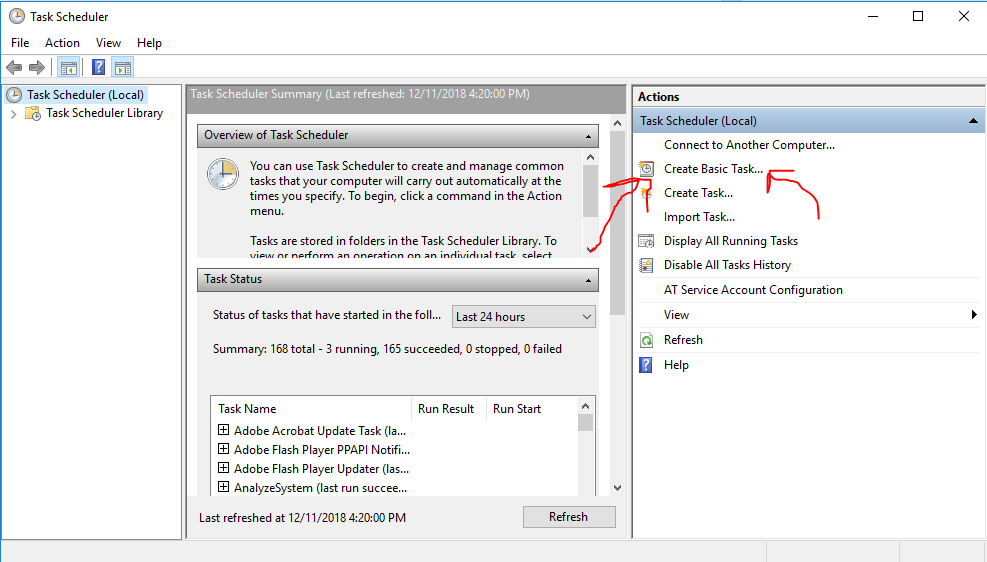
It should take you to the Task Scheduler where you should select Create Basic Task:
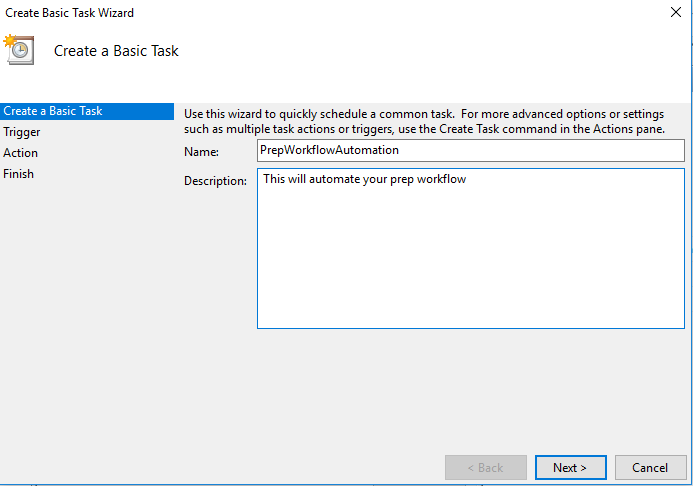
Then give it a name and description:
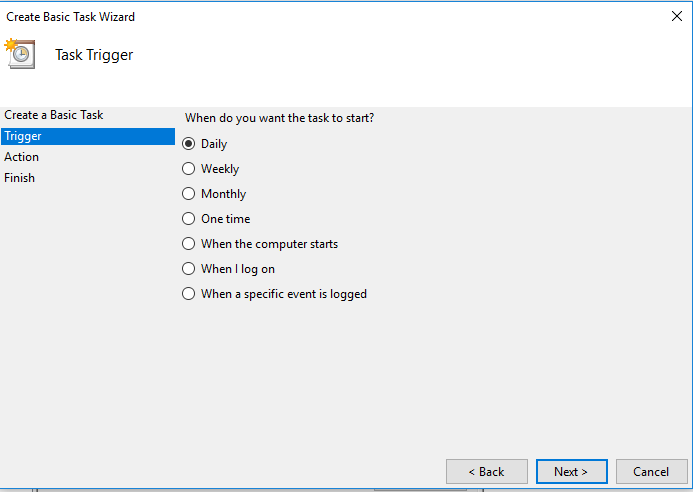
Next, select how often you would like the flow to be run:
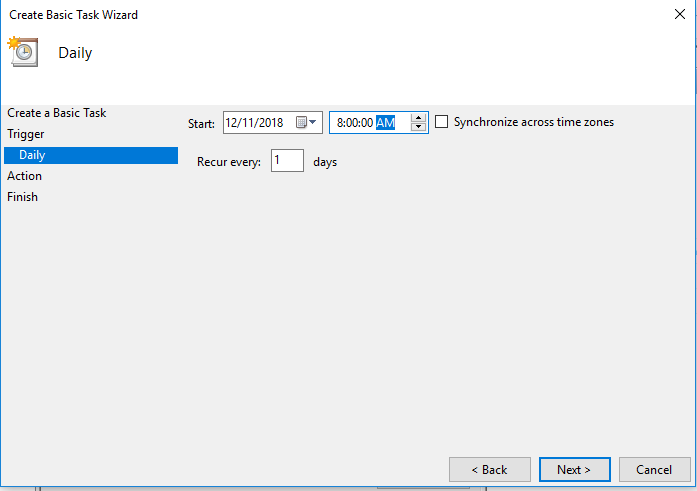
Choose the time of day:
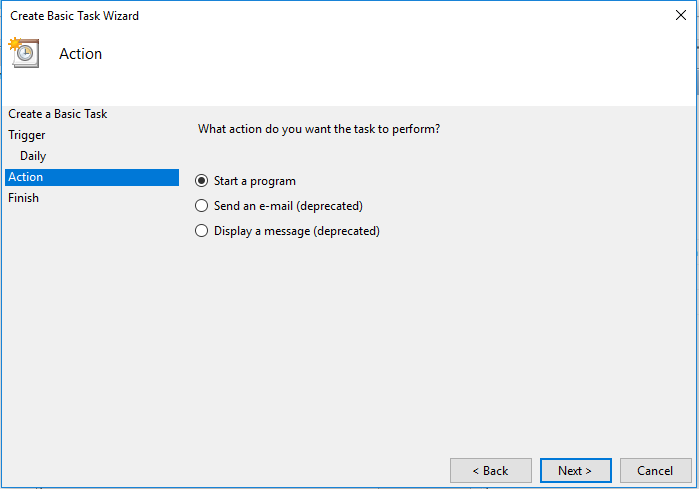
Then hit Next and select Start a Program:
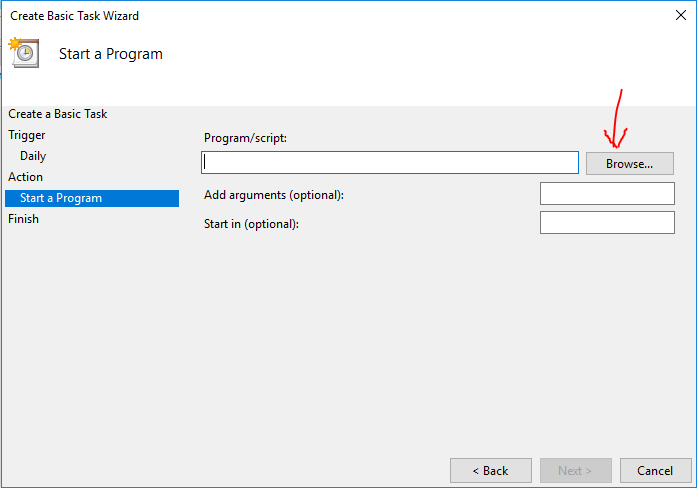
Select Browse and navigate to the batch file we made at the end of step two:
Hit Next, ensure everything looks good, then finish. Sit back, relax, and watch your workflows run like magic.

