Requirements:
- Drupal 6 or 7
- That’s it!
When first setting up a website, it’s important to consider how you want to organize your content. How will you distinguish blog posts from the About page? What if you’re going to be posting a lot of videos or even audio to your site?
There are a couple of ways you can separate out your content: one is Taxonomies (a very powerful and great feature). The other is Content Types.
Content types are simply… different types of content. These can be anything you want and are flexible enough to cover all of your different clients.
For example:
A website for an artist may have these content types: Paintings, Sculptures, News, and Page.
A site for a PR firm would have these types of content types: Newsletters, Tips, Representative Clients, Portfolio, News and Events, Blog, Page, and Webform.
A site for a restaurant may have: Menu Items, Drink Items, Specials, Basic Page, and Events.
Content types are great in that, you can set them up however you’d like to organize your site. Plus, you can specify extra fields for even more customization (we’ll get into that in a different post).
Have I sold you yet? Ready to make your own new content type?
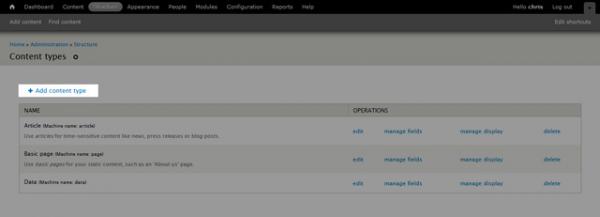
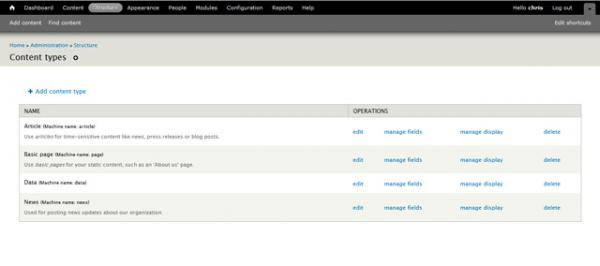
In Drupal 7, from the admin interface (http://yourdomain.com/user and log in), go to Structure > Content Types > + Add content type.
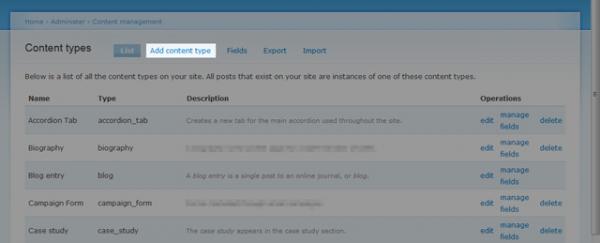
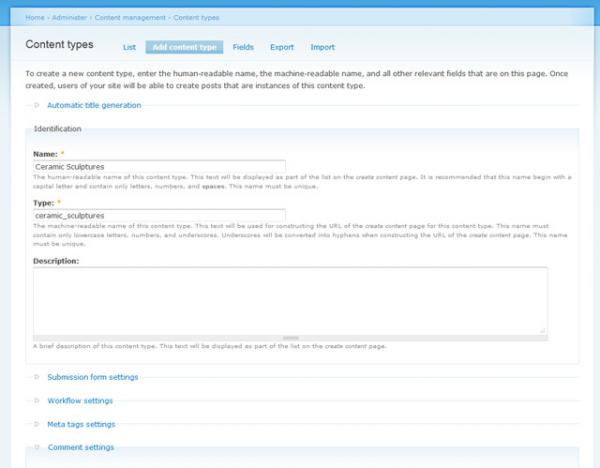
In Drupal 6, you’ll go to Content Management > Content types > Add content type
In Drupal 7, give your new content type a name and Drupal will auto-assign it a machine-readable name (don’t worry about this, it’s all good). You can give it a description as well that will help you and your other admins differentiate between content types.
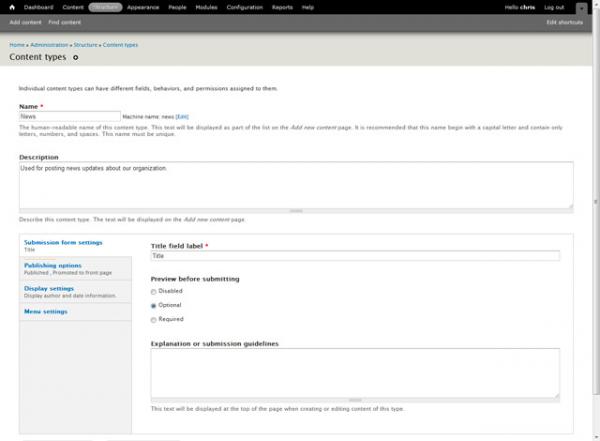
After the description, you can click on the vertical tabs to further customize your new content type. A couple to take note of:
Under “Publishing options”, you may want to check “Create new revision”. This will tell Drupal that, when you update any content in this content type, to keep a copy of the old version. This way, you can revert back to it if needed.
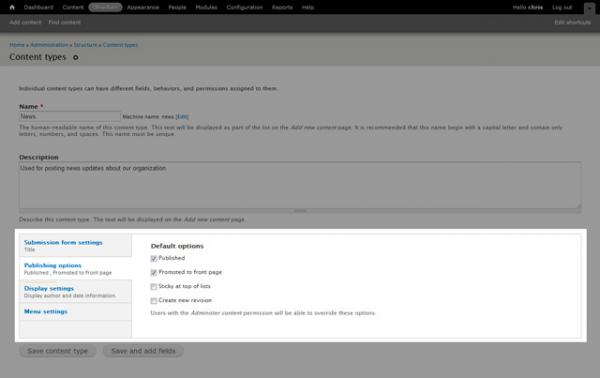
Under “Display Settings”, you may want to uncheck “Display author and date information”, especially if your new content type will include more static text than regular updates.
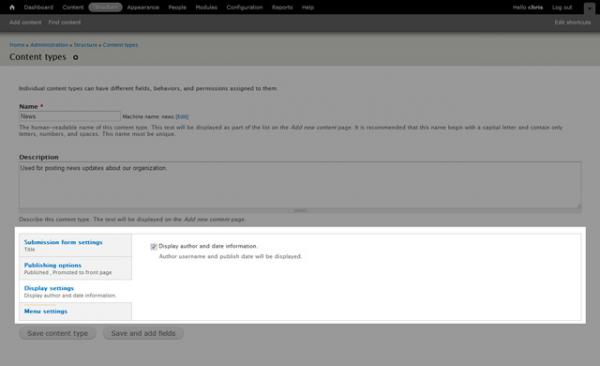
After that, click “Save content type” and you’re all done! You can now begin posting to your new content type.
In Drupal 6, things are just slightly different. Add a Title for your content type, then, add a “Type” or machine-readable name. A machine-readable name can only contain lowercase letter, numbers and underscores and must be unique.
After that, an option you may want to change is the comment settings. To disable commenting, click on the “Comment settings” label and your options will accordion down. Then select the Disabled radio button.
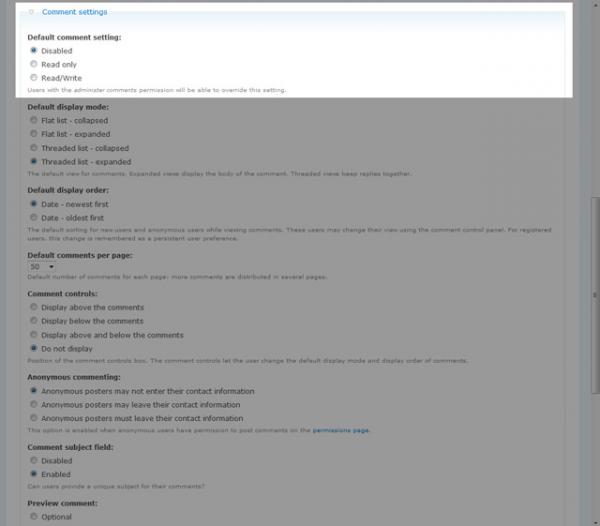
After you’ve gone through these steps, you can click “Save content type” and you’re finished!
You’ve successfully created your first custom content type. Now go and enjoy a beverage and start creating nodes in your new content type.

