If you missed my intro into getting AddThis installed and configured, you can view it here.
Requirements
Optional
After getting AddThis up and running (see previous post), you can customize AddThis a bit more to give you / your end-users even more control. You can create a custom field that will be the text of the tweet instead of just the title. This is helpful when you want to your visitors to use specific hashtags or perhaps when your title is ill-fitted for Twitter.

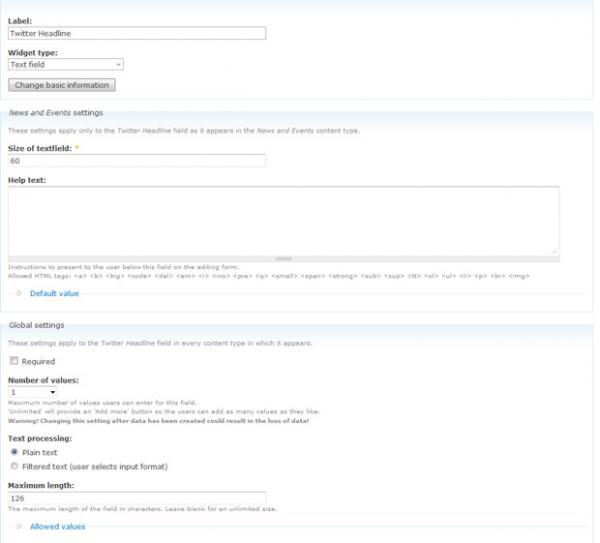
So, to do this, first, create a custom field in your content type. I’ve labeled mine Twitter Headline with a machine name of field_news_t (because it is going in my “news” content type).
If you’ve installed and enabled Maxlength, make sure you input 126 into the Maximum length field. You’ll use 126 (instead of 140) because the bit.ly link will use 14 characters, including the space between the title and the link.

Now, the code to let AddThis know that there is a custom Twitter template, you must add the following code to page.tpl.php (Drupal 6) or html.tpl.php (Drupal 7):
var addthis_share = {//…templates: {twitter = " {{url}}"}}
So, in order to get our custom field into the module, we must do a little bit before that code.
First, we have to get the field into a variable:
$tweet = $node->field_news_t[0]['value'];
But what if you/your clients don't want to enter custom data for a particular node? Let's add a conditional:
if($node->field_news_t[0]['value'] != NULL) {$tweet = $node->field_news_t[0]['value'];} else {$tweet = $title;}
So now our final code looks like this:
if($node->field_news_t[0]['value'] != NULL) {$tweet = $node->field_news_t[0]['value'];} else {$tweet = $title;}var addthis_share = {//…templates: {twitter = " {{url}}"}}
NOTE: for certain page templates, you may need to add $node = node_load(arg(1)); before the previous code.
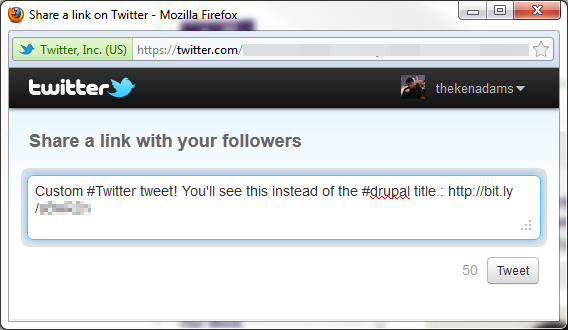
Upload your template, clear your cache and you should be good to go. Now, when your visitor clicks on your AddThis Twitter button, they'll see your custom tweet instead of just the title.


