The title of this post should be “Adding Social Media Sharing to Your Content” as the service we’re going to look at is not only for Drupal, but Blogger, WordPress, Tumblr, Joomla, TypePad, Posterous, Flash, the iOS or Android SDKs, an email newsletter or just a static site.
AddThis is “the world’s largest sharing and social insights platform”. The service helps you share your content on virtually every social network and sharing site WORLDWIDE! Of course, here in the US, we’re mostly concerned with Twitter, Facebook, StumbleUpon, Google+, LinkedIn and maybe an email.
AddThis will plug into about any system and allow your visitors to quickly and easily share content from your site. There are some customizations you can do and also some analytics that come with the service, but today, we’ll focus on getting the service up and running on your Drupal site.
Requirements
- Drupal 6+
- AddThis module
- Note: for greater customizations and analytics, you’ll need to sign up for a free account on AddThis’s website. You can use your Facebook, Twitter, Google or OpenID accounts or just an email address.
After installing the module, it is important that you set the permissions for your role to be able administer the module – there is only one permission setting, so you do not need to give anonymous users permission.
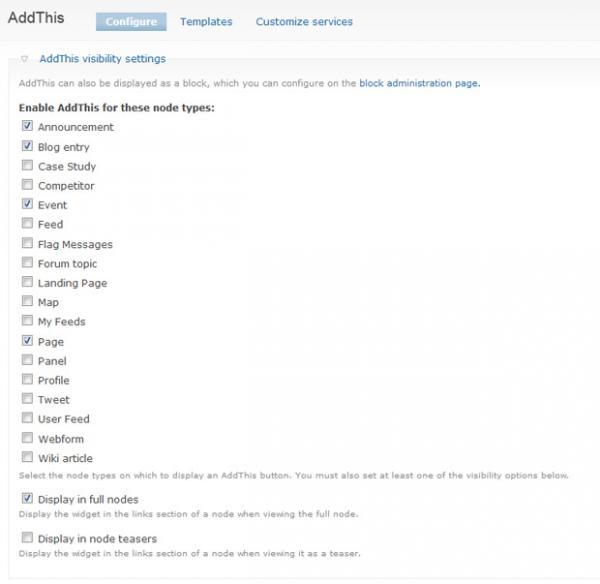
Next go to the AddThis settings (/admin/settings/addthis). From here, you will set which content types will utilize the service. You’ll be able to select your widget type and the services in your widget.

AddThis allows for you to show 3 different “levels” of services. First is the toolbox services and these are the ones that are most prominently displayed. You can add counters to them and they are always showing.

The Compact menu services are the ones that will be displayed in the rollover menu with the plus icon. These allow for more services without taking up any more room in your design.

Now, for the rest, put those in the Expanded services. This will provide a pop-out of even more services. If you don’t have any more you’d specifically like to show, leave it blank and it will display all of them.
You’ll have to use AddThis’s service codes, but they provide a list of all of them by clicking “List of basic service codes”
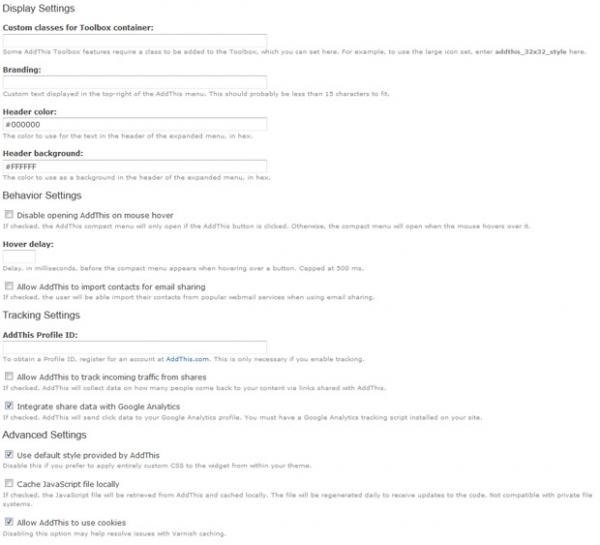
Next, you can control how your button or toolbox is displayed by adding custom classes, branding, and adjusting a few colors. My preferred method is to override the styling via CSS, which give me even more control.
The last part of this page deals with behavior and tracking. If you use Google Analytics, go ahead and check the integration box. If not, here’s where your AddThis.com account will come in handy.

AddThis integreates well with Views, so, you can either display it in a node or a View. This will get you up and running with AddThis, though there is some added customizations that I’ve covered here. Enjoy!

